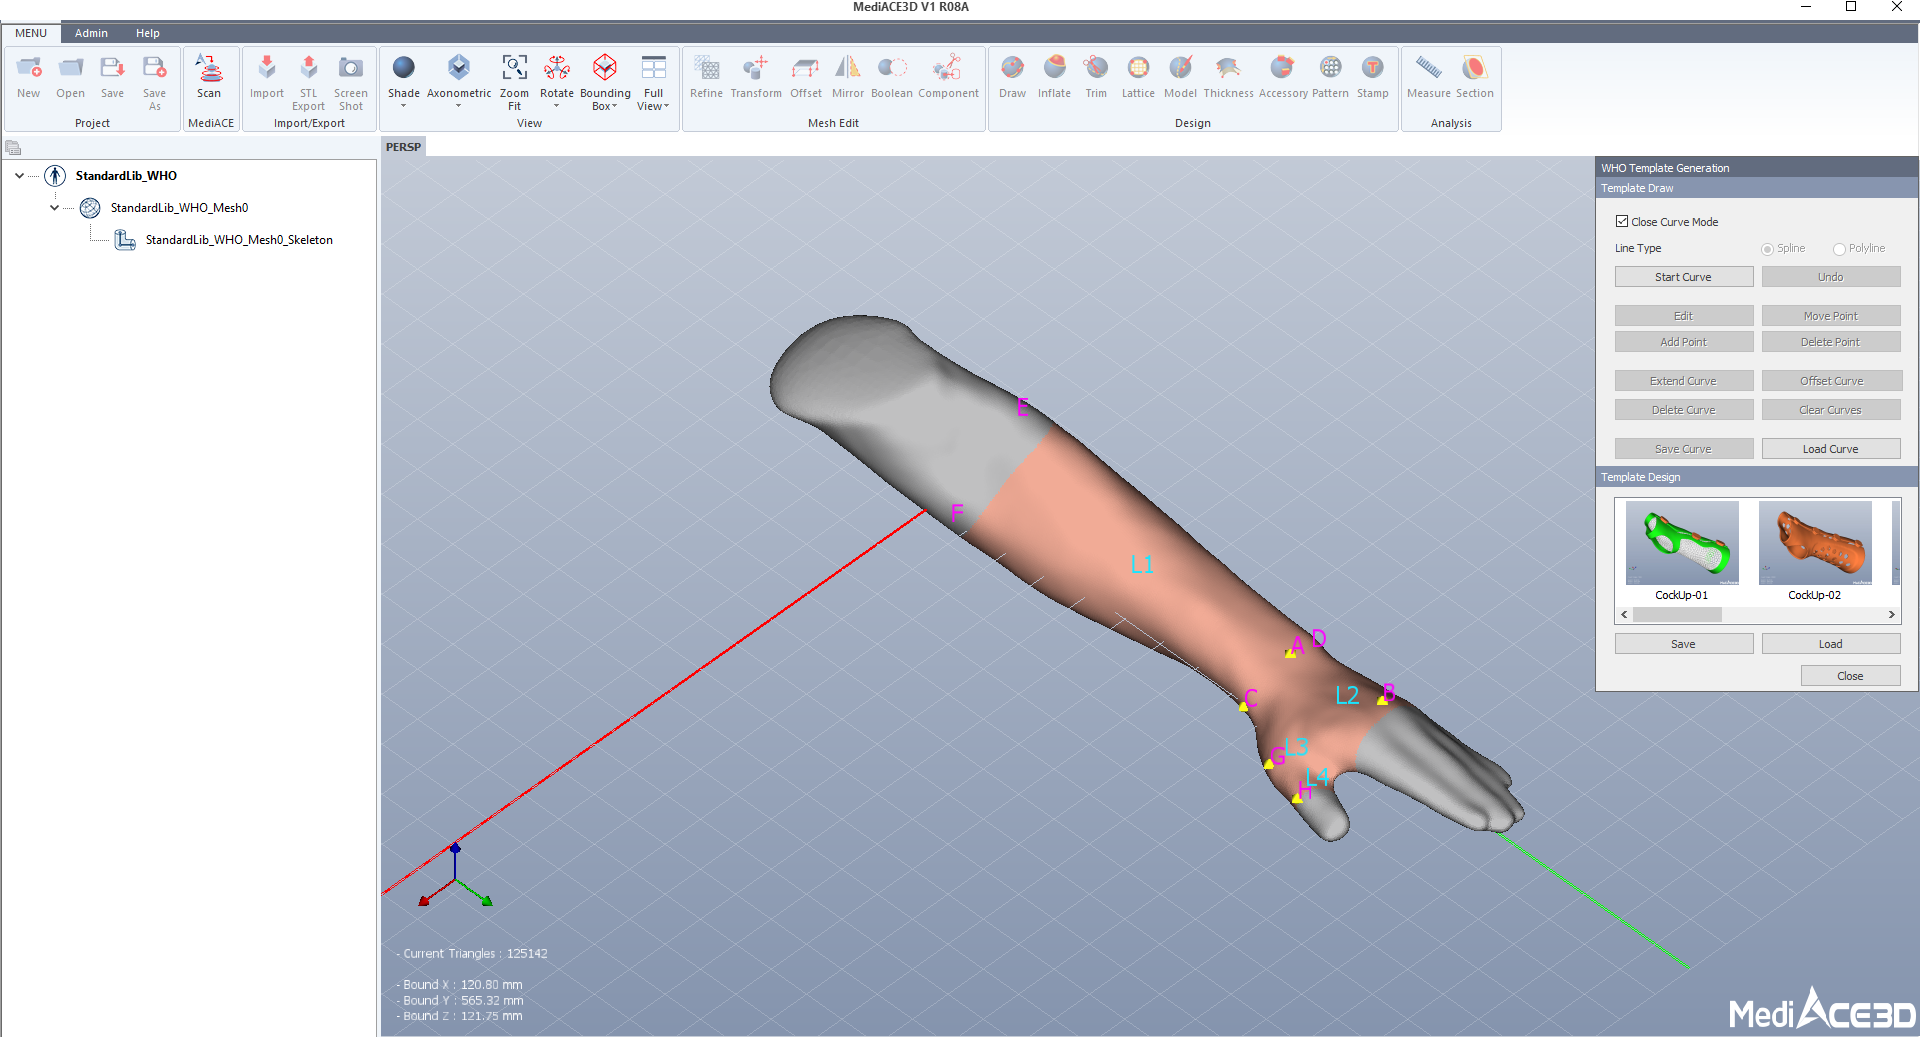
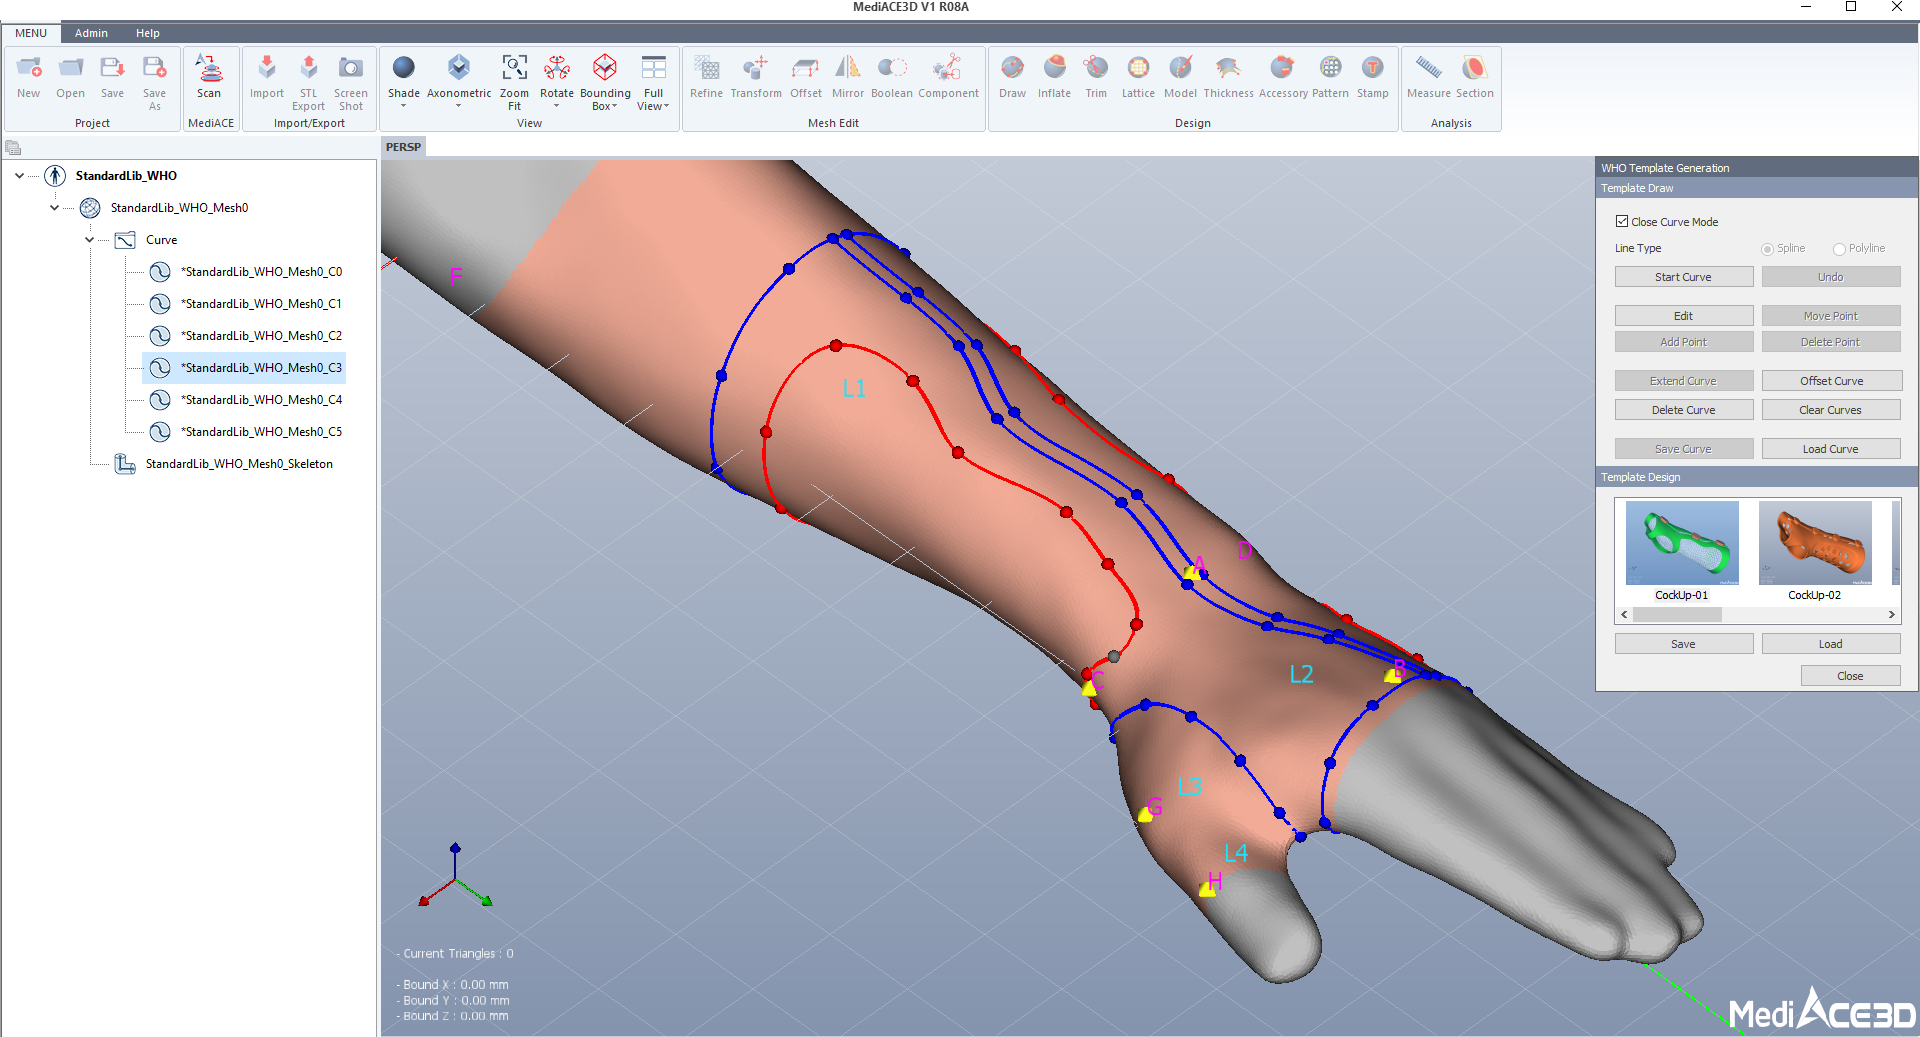
The hand model, defined as a standard library containing skeleton information, is loaded, and the design draw function is used to create a design curve and register the template design.
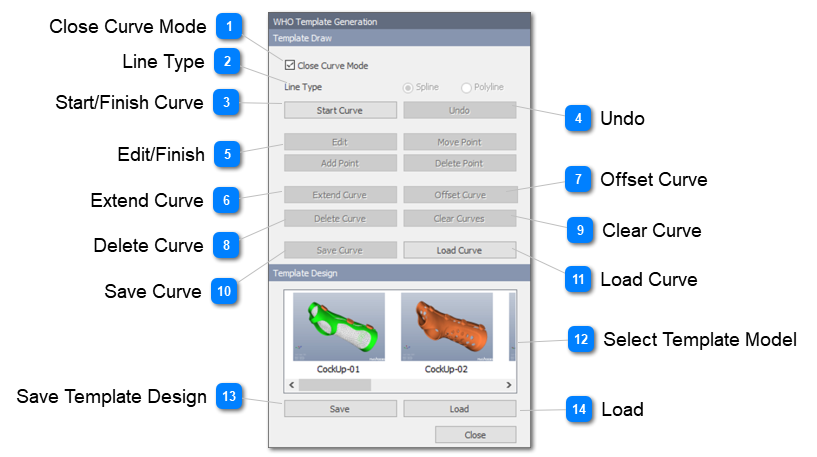
Close Curve Mode
Keep the closed curve connecting both endpoints
In the Close curve mode, the two endpoints operate like one point.
To create a curve, click the Start curve button and finish one curve with the Finish curve button.
Create smooth curves with minimal points.
Do not create curves that deviate from the skeleton base point of the toe area toward the toe.
To create a curve, click the Start curve button and finish one curve with the Finish curve button.
Create smooth curves with minimal points.
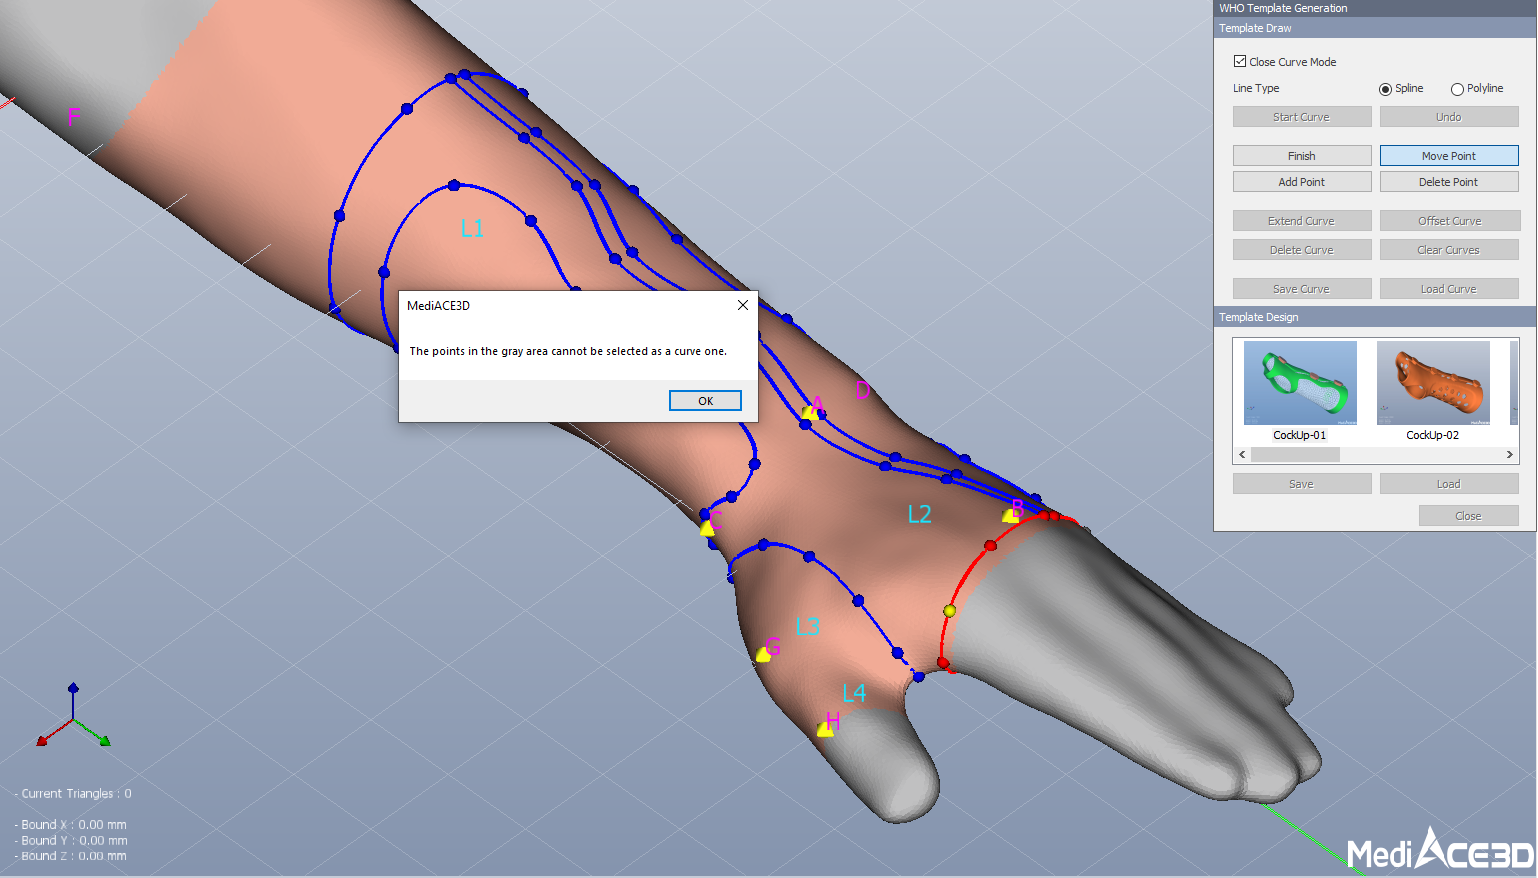
※It is not possible to create a design curve that passes through the gray area shown in the standard hand model, and the system automatically prevents it.